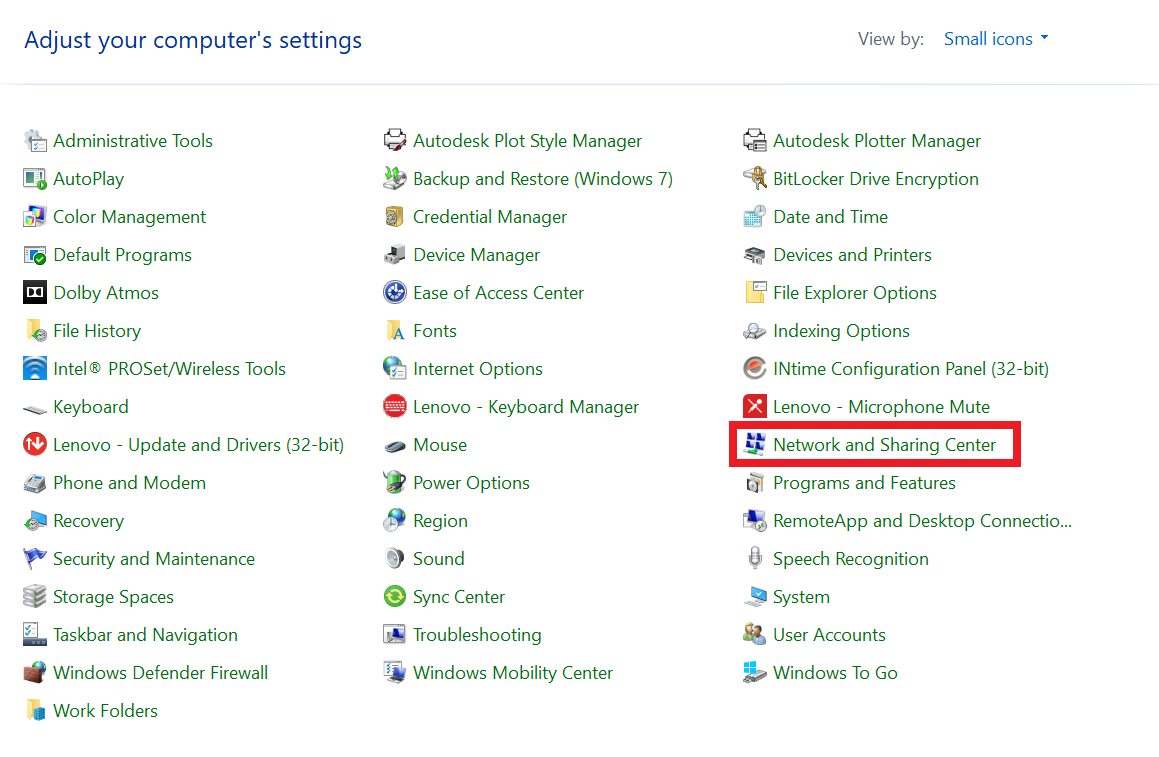
- Open Control Panel and navigate to the Network and Sharing Center
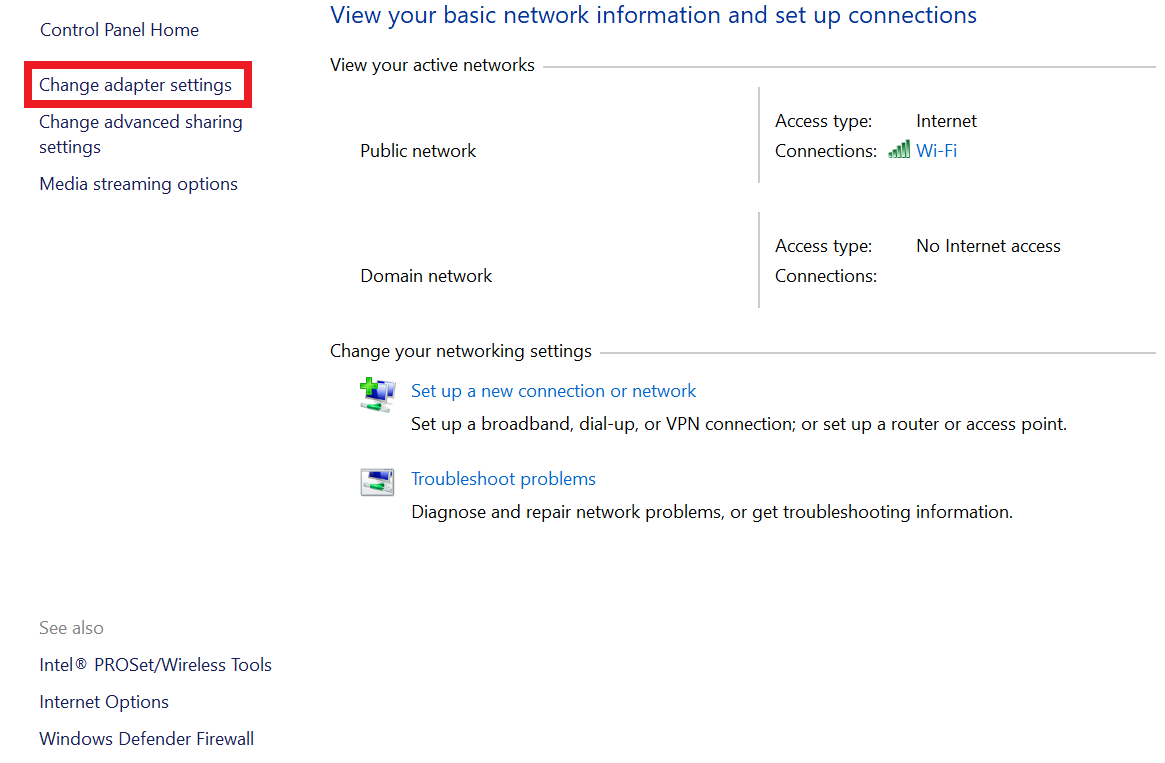
- In the top left hand corner, select Change adapter settings
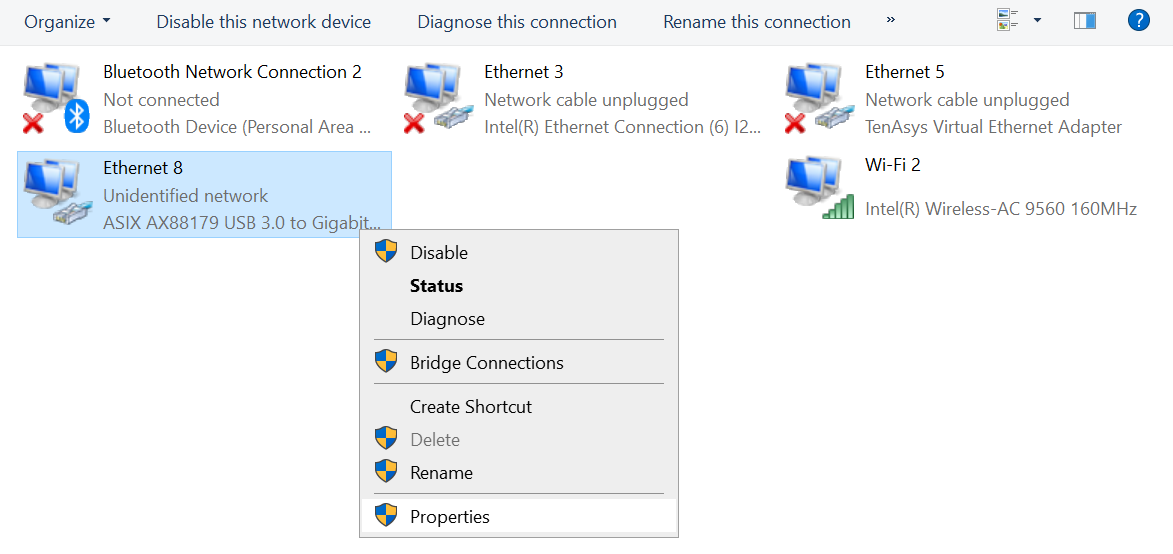
- Right-click on the Ethernet adapter that is connected to the device you want to configure and select Properties
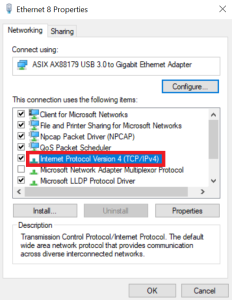
- In the list of items, double-click on Internet Protocol Version 4 (TCP/IPv4)
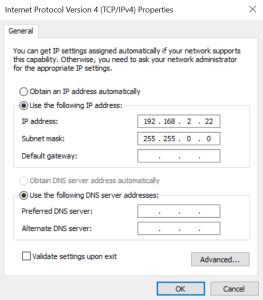
- Select Use the following IP address and enter an IP address and Subnet Mask that is on the same network as the connected device
For example:- IP address: 192.168.2.22
- Subnet Mask: 255.255.0.0
- Leave the Default Gateway blank unless you know that this is necessary for your network.
- Click OK to save the new network settings of the PC's Ethernet adapter
|